If your jeans are too long, you have a few choices on how to wear them.
They can be cuffed, but a cuff can emphasize short legs, especially if worn with flat shoes.
They can be worn too long, but the wearer will look unkempt.
The extra length can be turned under and hemmed, but distressed jeans will lose their original hem and the wearer will look uncool.
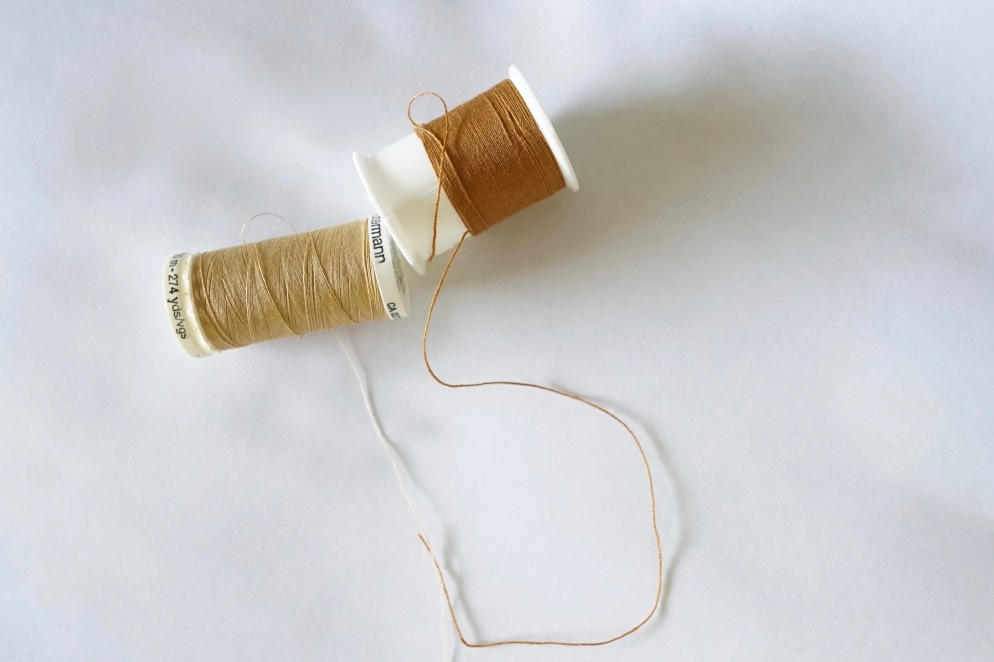
If you decide to hem your jeans with a topstitch, take care to match the thread used for topstitching elsewhere on your jeans. The thread on the right is made to match typical gold topstitching on denim.
My husband’s jeans below could easily have been hemmed the old fashioned topstitch way, but there are two reasons that I used an original hem to shorten these:
#1 I didn’t want to go to the fabric store to find the perfect thread.
#2 I wanted to demonstrate how to sew an original hem.
Here are the Instructions for How to Sew an Original Hem:
Skill Level: 2.5 (on a scale from 1-10, 10 being EXPERT)
Time involved: 20 minutes (depends on your skill level, but I think 20 minutes is safe to say for an average seamstress/seamster)
Try jeans on. With chalk, fabric pencil, or a pin, mark the length at which the jeans should be hemmed. Mark both pant legs, in case the wearer has slightly uneven legs. Cut hems at the lines marked.
*I prefer to error on the side of making my hems too long because once they are too short, there is little that can be done to reverse the error. Think this through before you cut!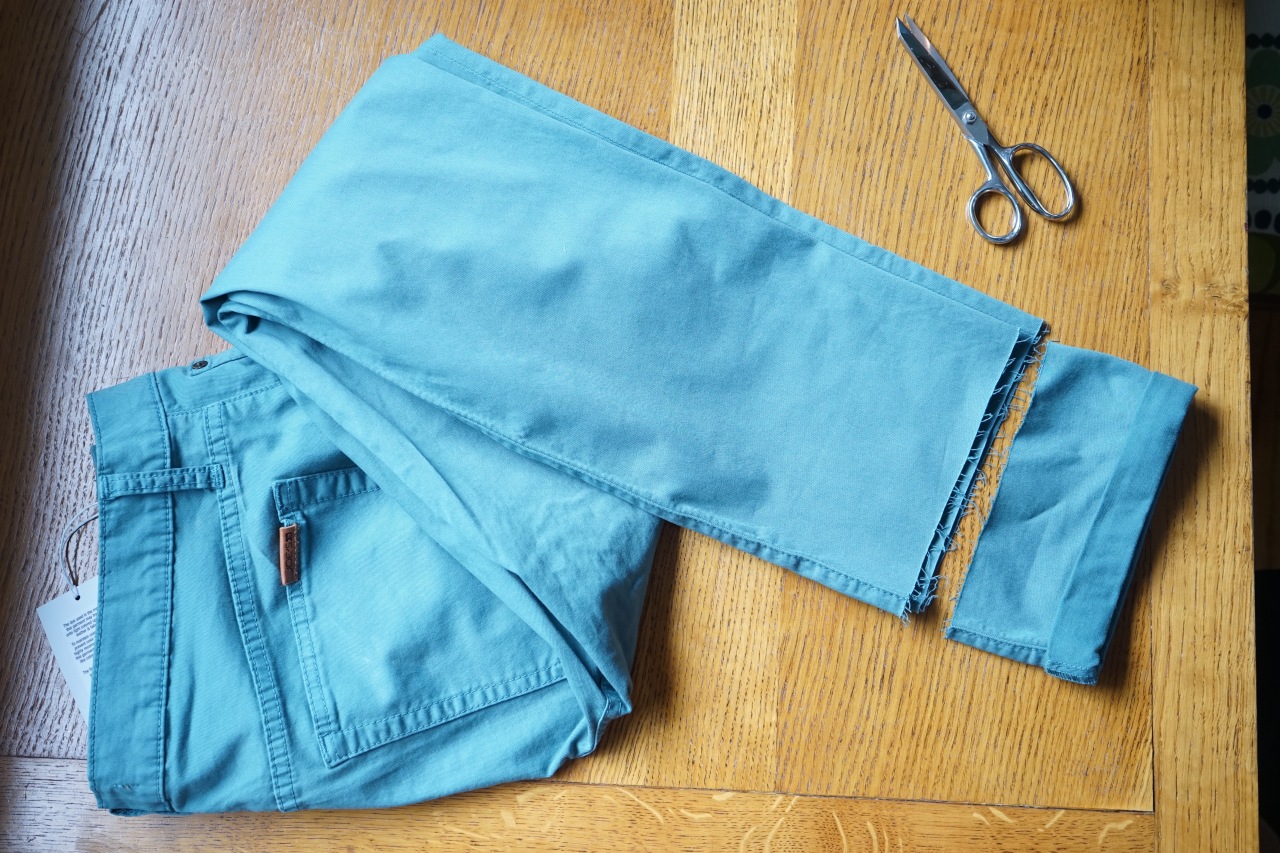
Working with the original hem that was removed from the jeans, cut 3/8″ above the original hem stitching.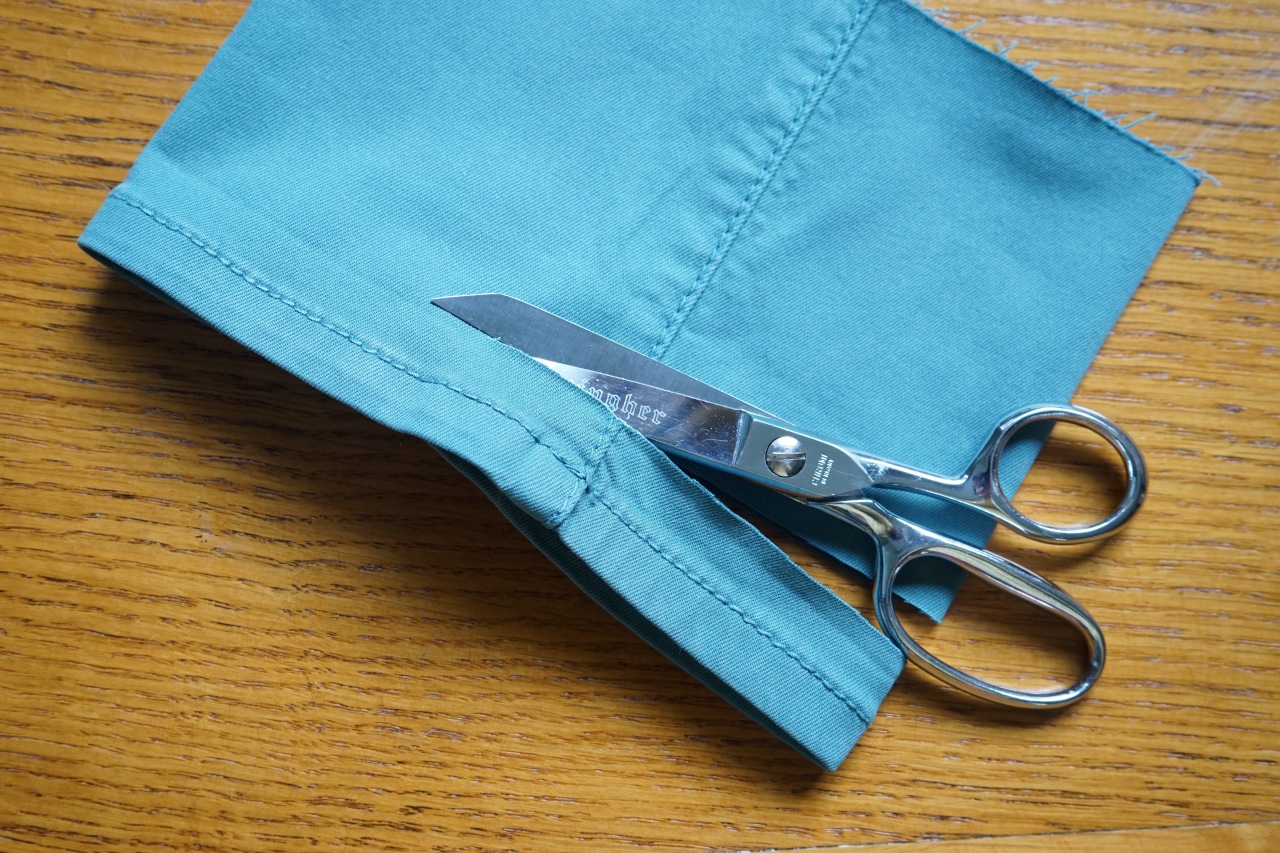
When each pant leg’s hem is cut, line them up with the leg they came from. Otherwise, the side seams will not match.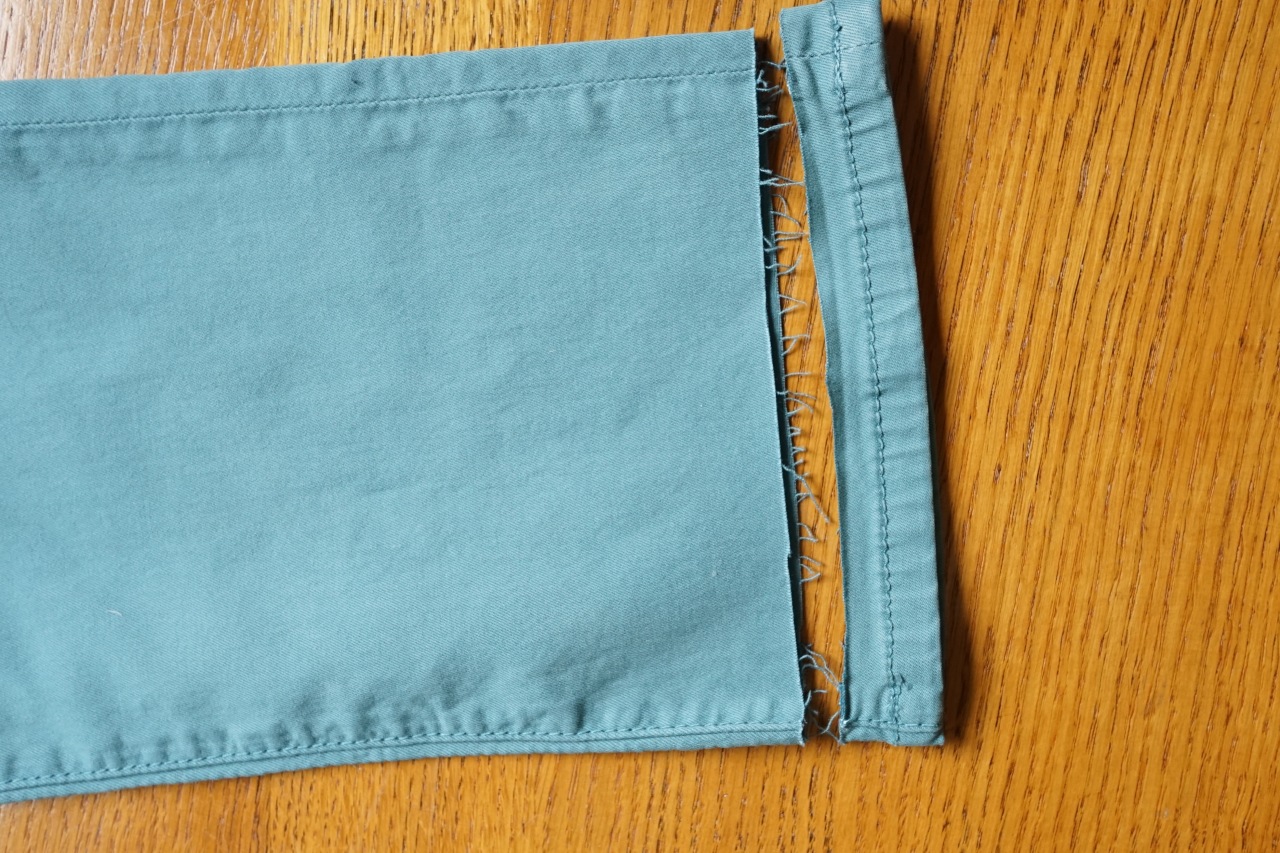
Flip the original hem wrong side out, keeping the jeans right side out (in sewing lingo, “with right sides together”). Align the raw edge of the original hem with the raw edge of the pant leg it was cut from, taking care to line the side seams up with each other. I line the side seams up and pin them first, then I pin the edges between the seams.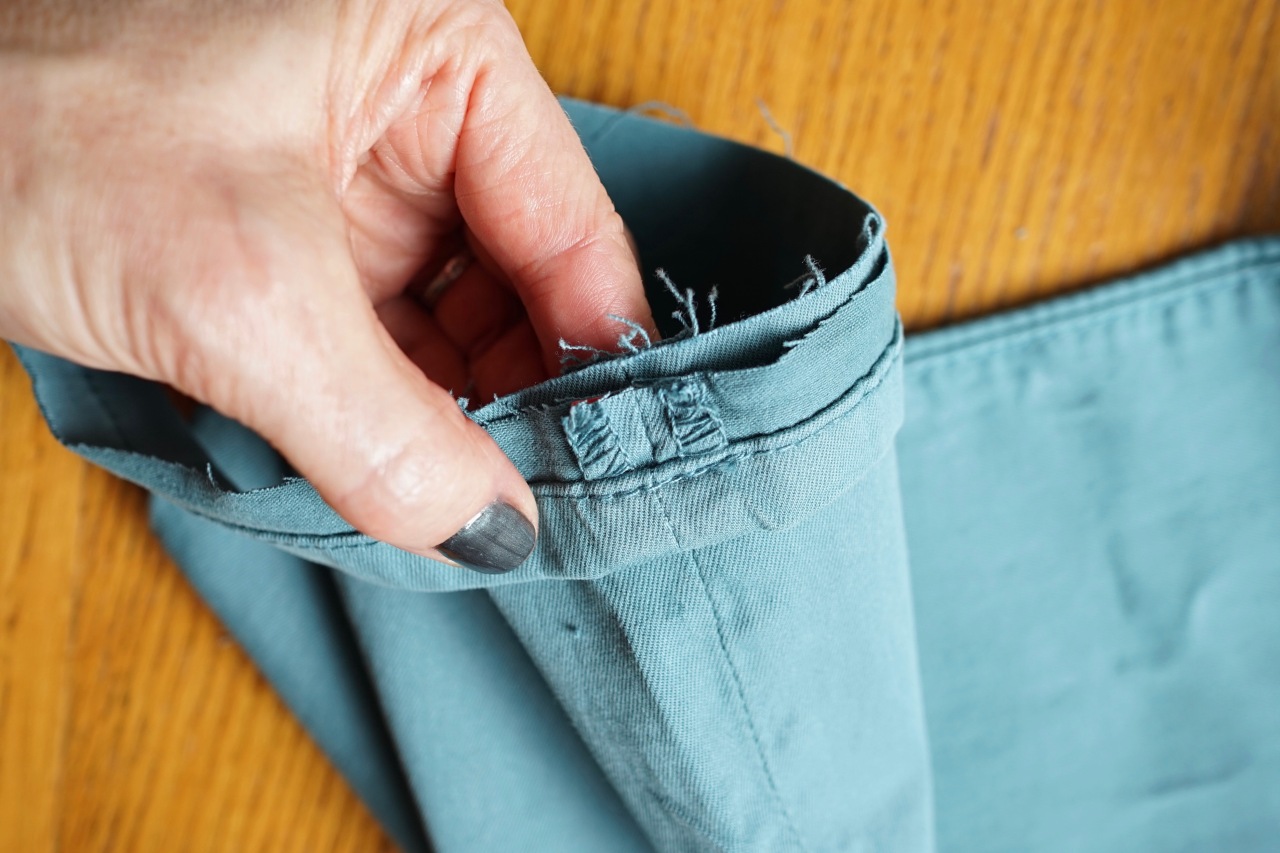
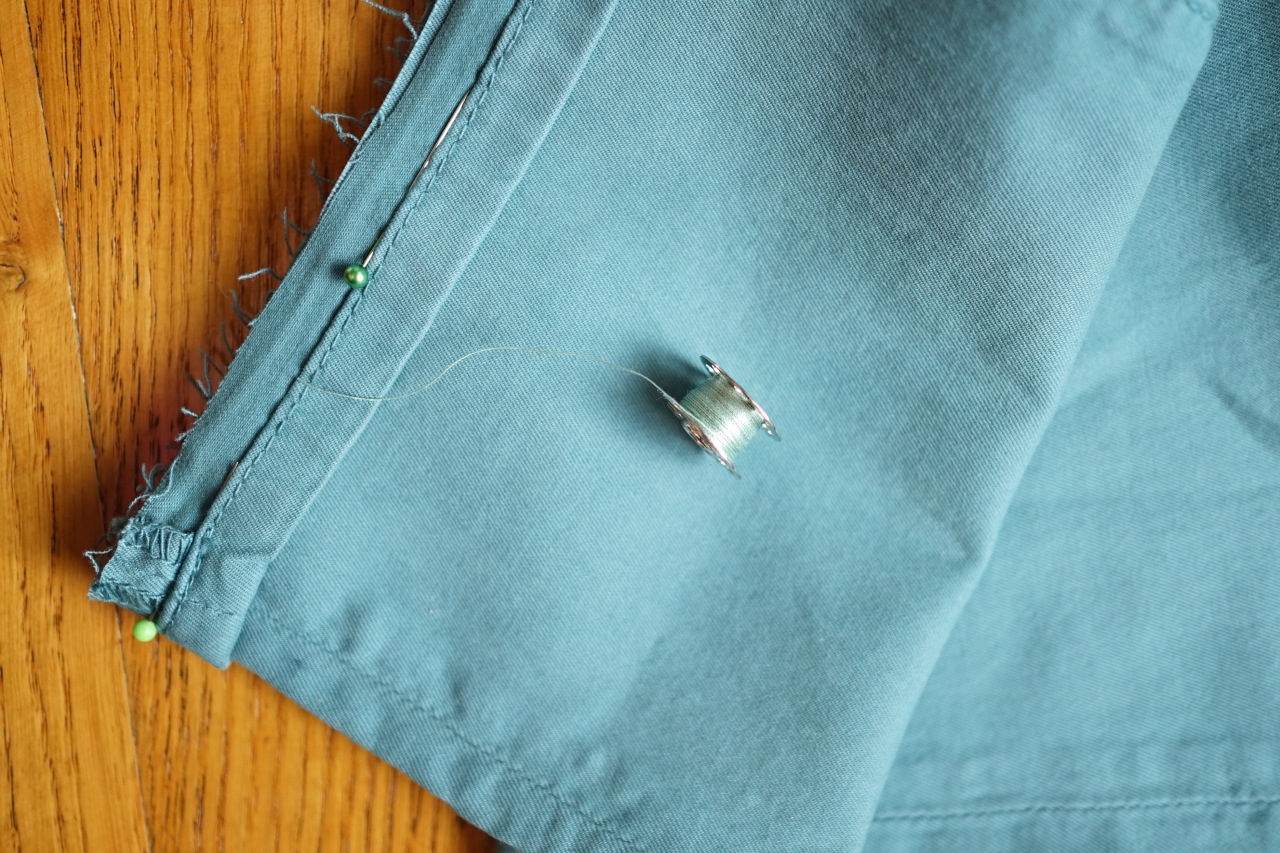
Choose the closest matching thread you have. Typically, it’s best to go with slightly too dark verses too light. Darker colors will recede and not attract the eye in the way that light colors will. *Quilters often choose grey as a safe neutral.
I chose the middle color, it wasn’t a perfect match, but it was the best of my options.Thread your machine and sew through the two thicknesses of fabric, as close as possible to the folded edge next to the stitching on the original hem, without sewing onto the original hem. If you have a blind hem sewing machine foot, its a breeze! Make sure to reinforce the stitches, so that they don’t unravel.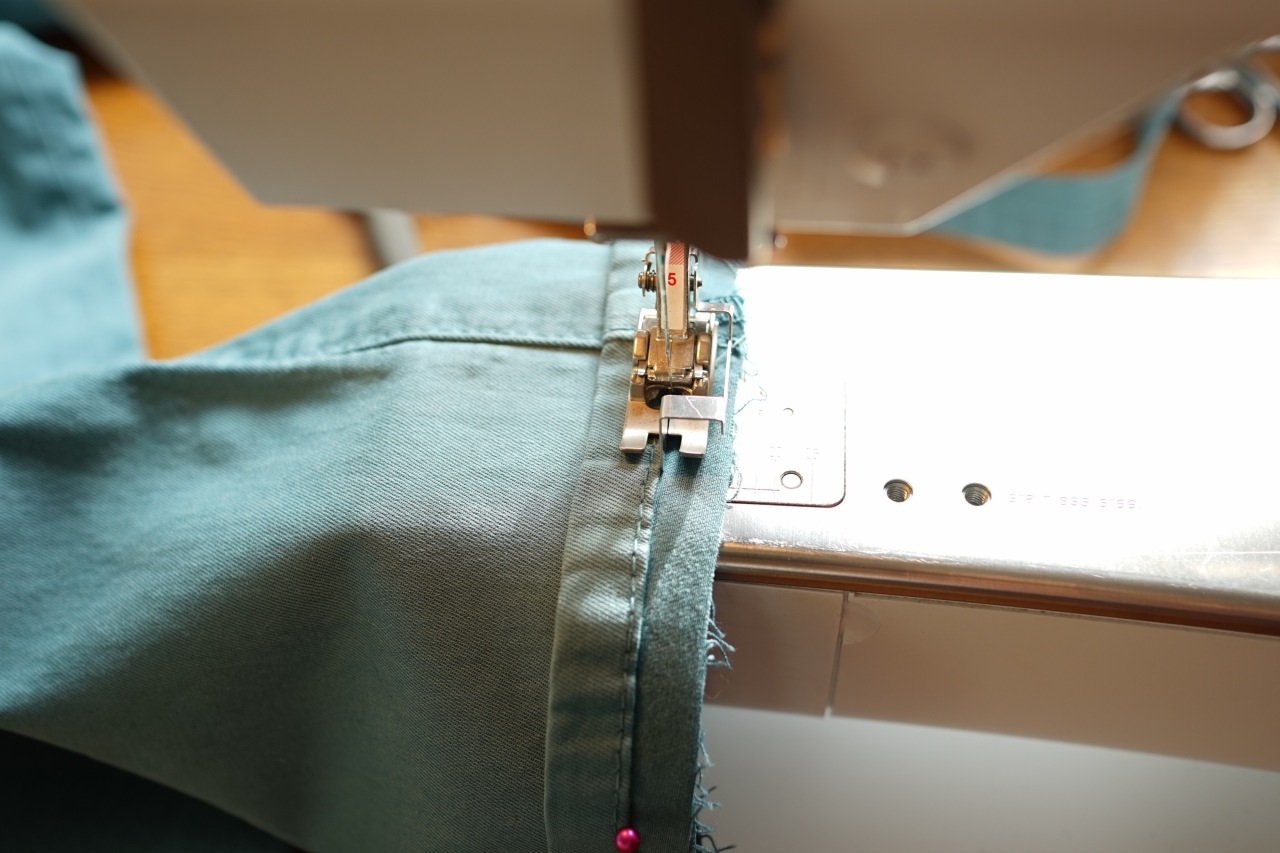 Finish the raw edges with zigzag stitching, to keep them from becoming a frayed mess. (You can also use a Serger or Pinking Shears.)
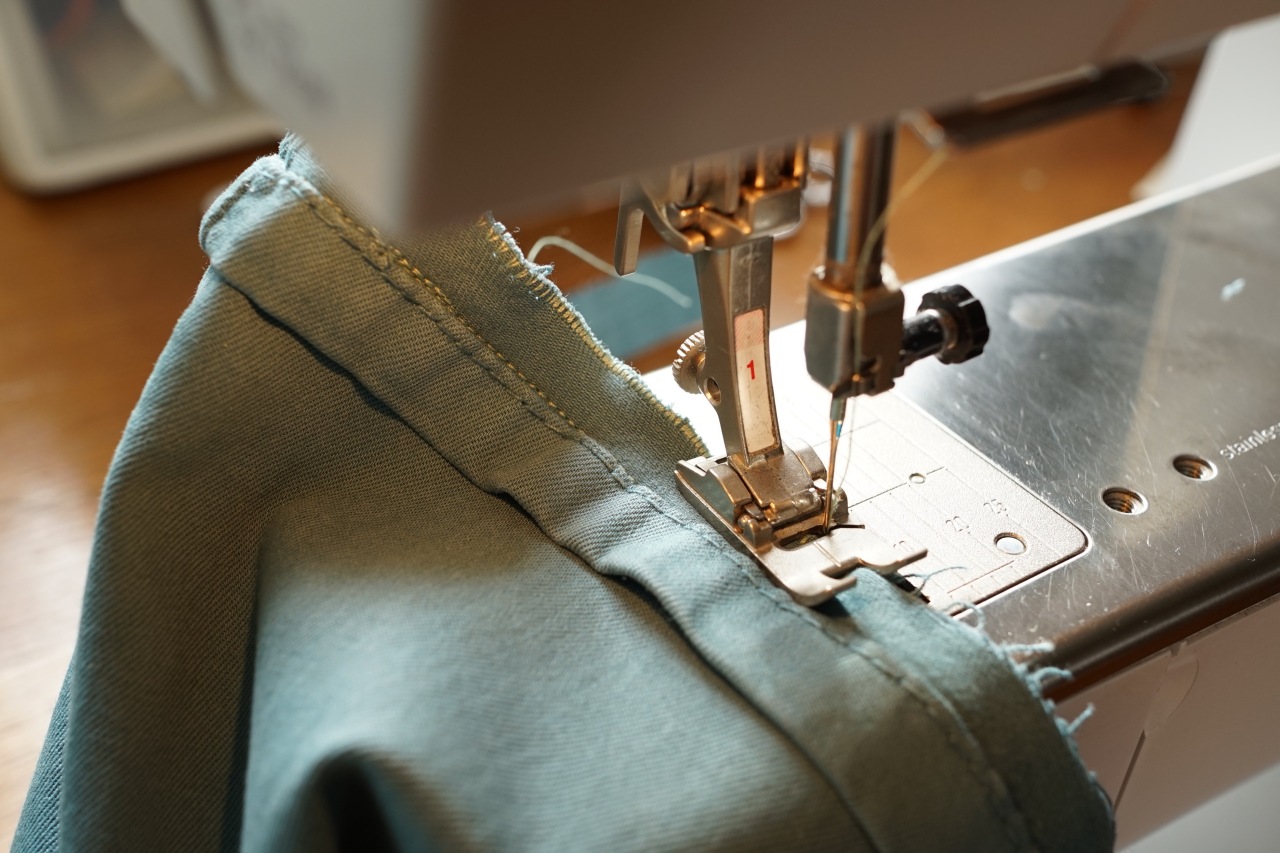
Trim the frayed edges after zigzagging.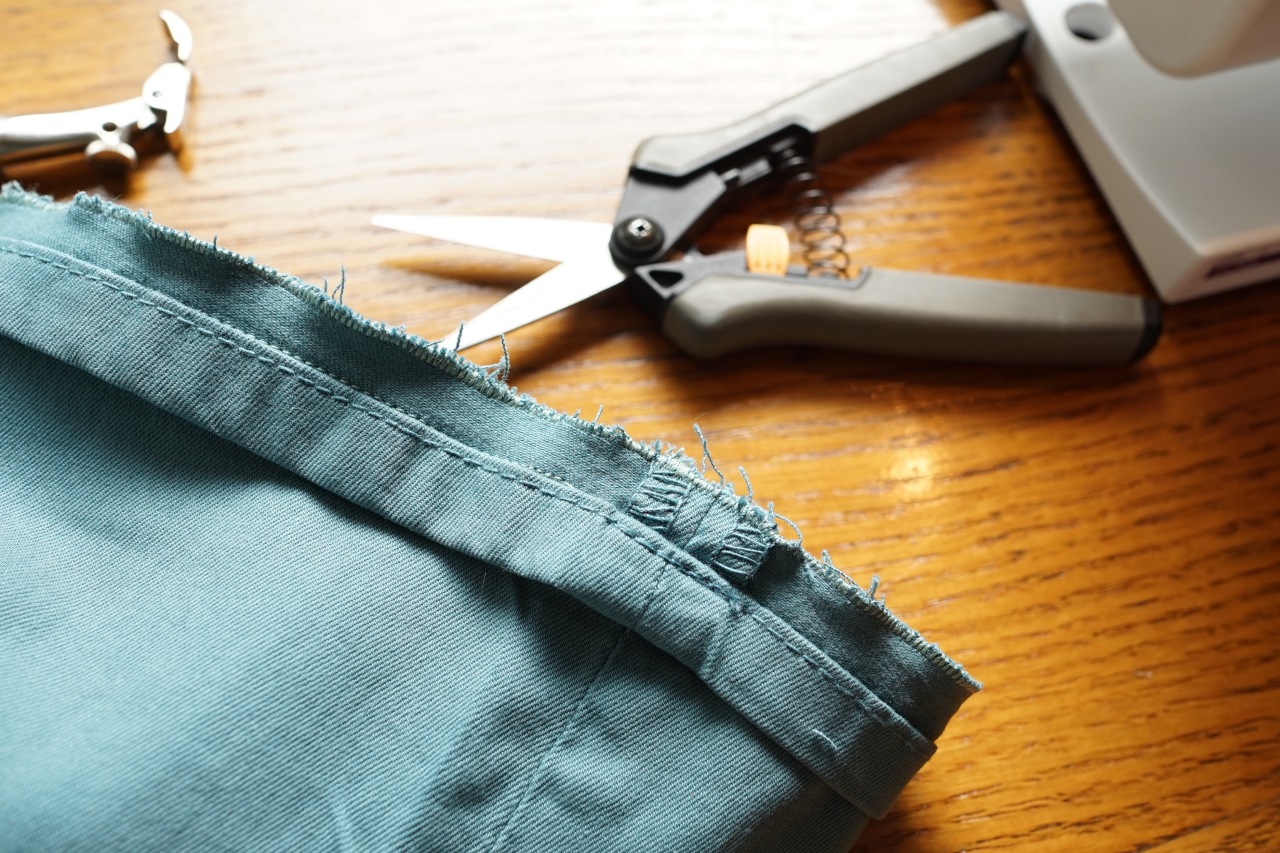
This is how the hem will look, but there are a few more steps.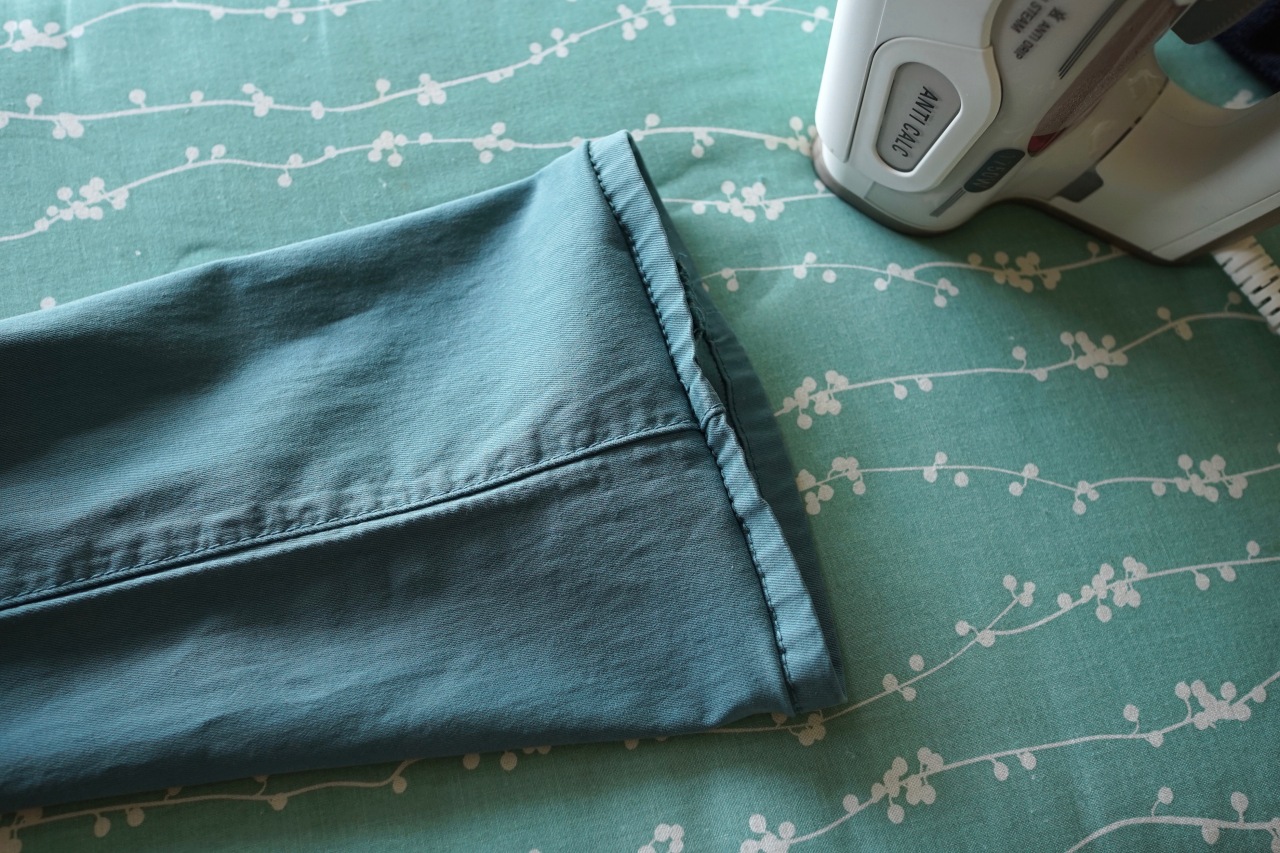
Iron the hem smooth.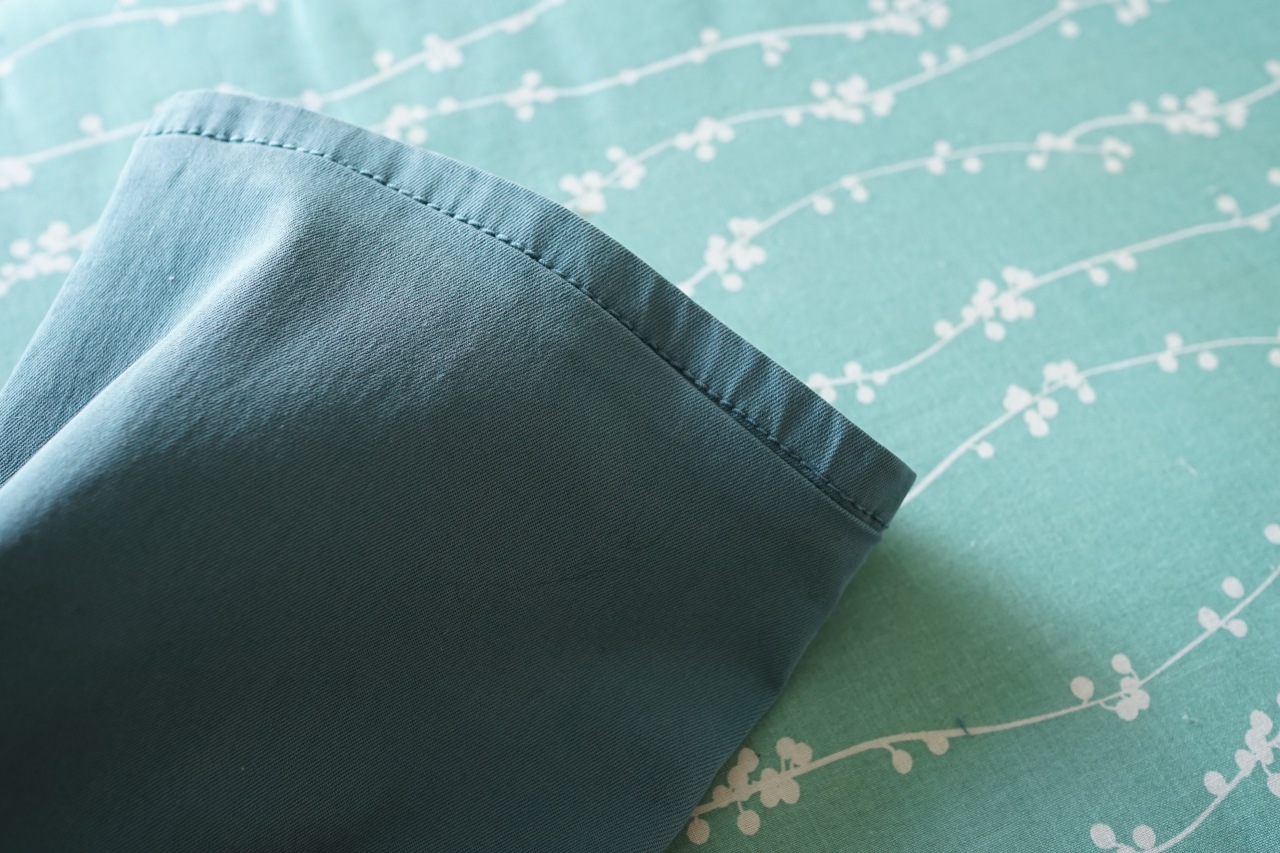
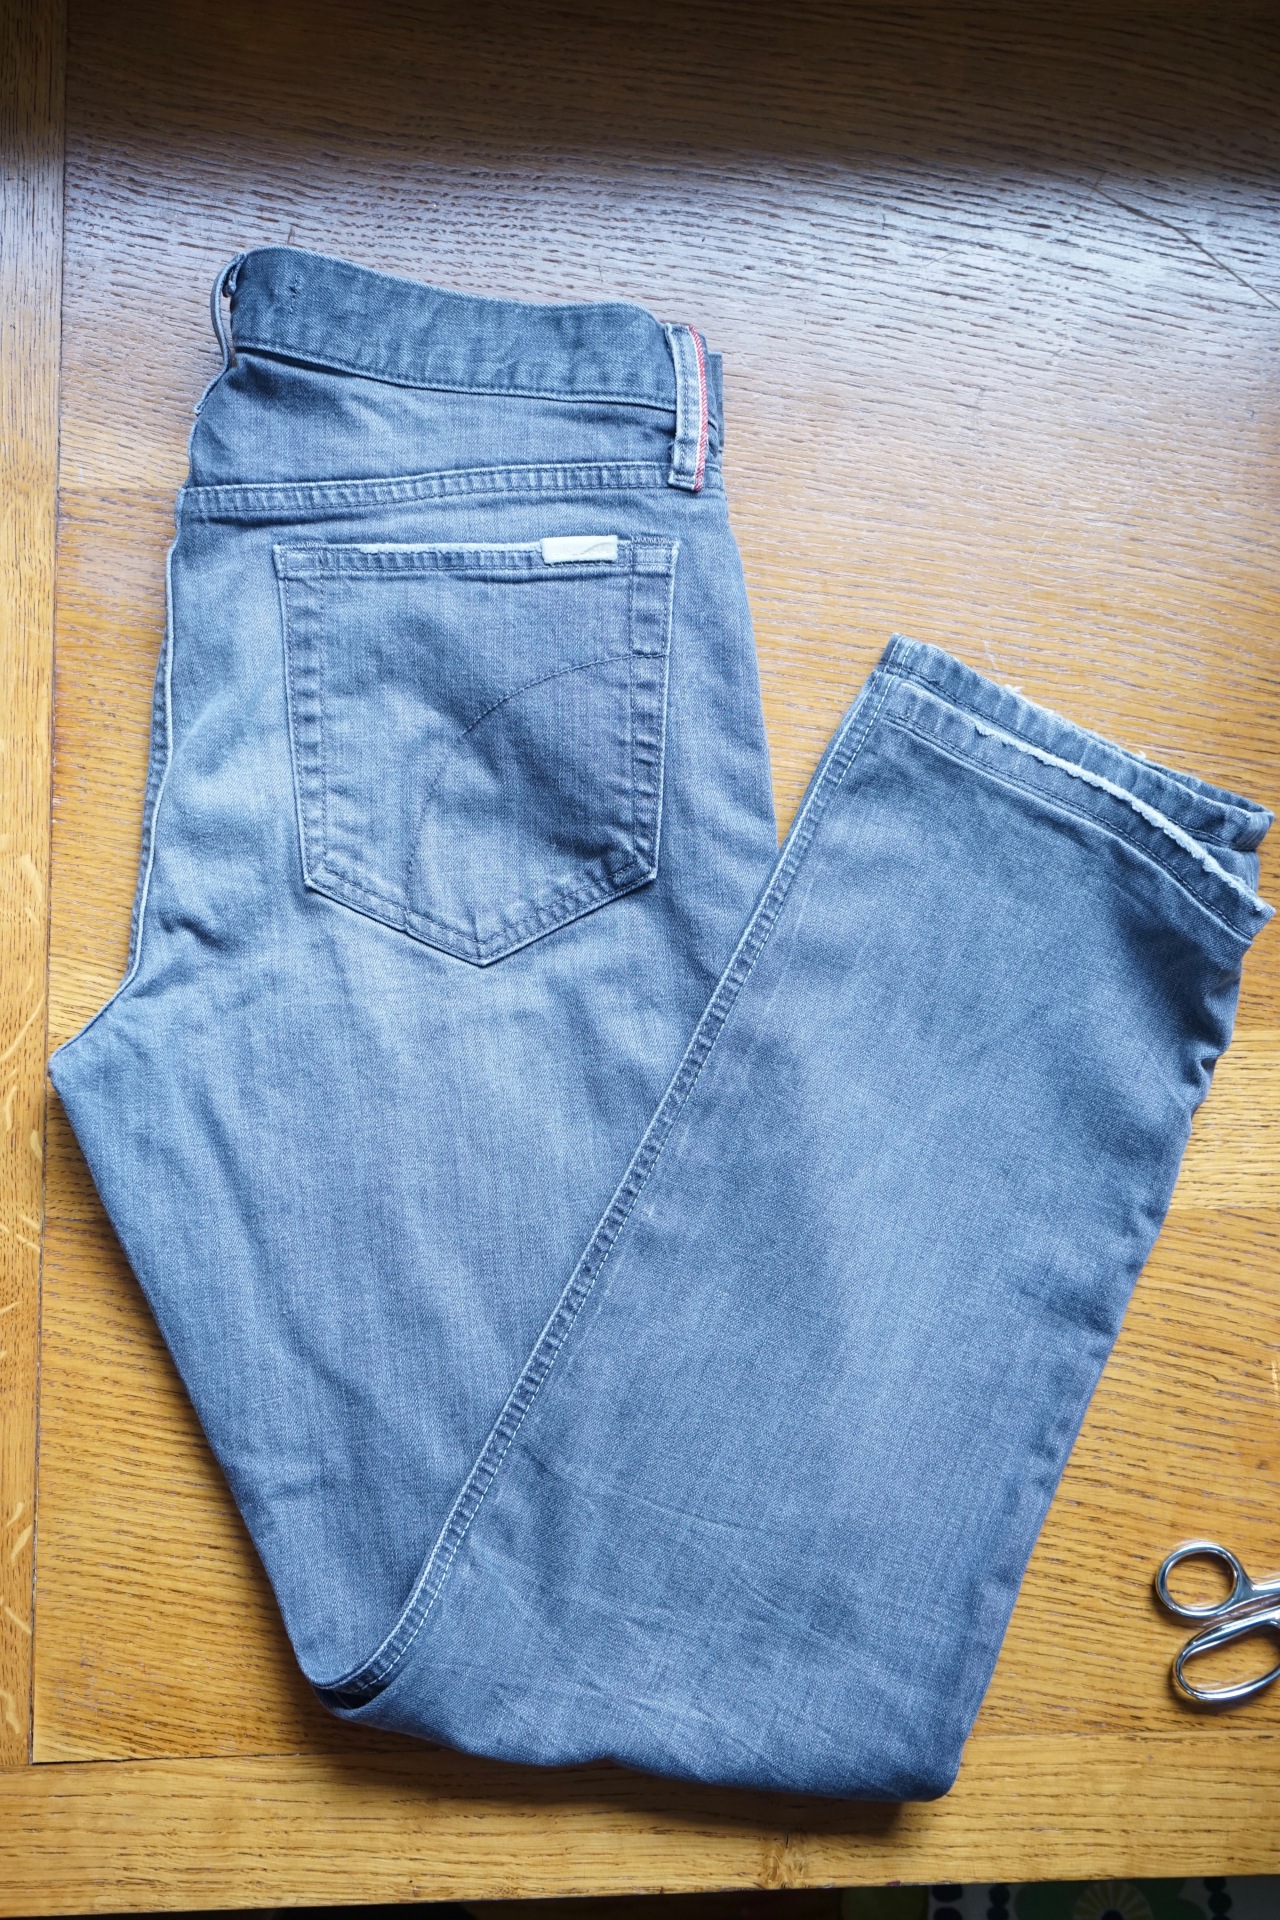
Topstitch the side seams to keep the zigzagged edge from turning down and hanging below the bottom of your jeans. When stitching, try to pull the side seams apart, so that the topstitches will be hidden.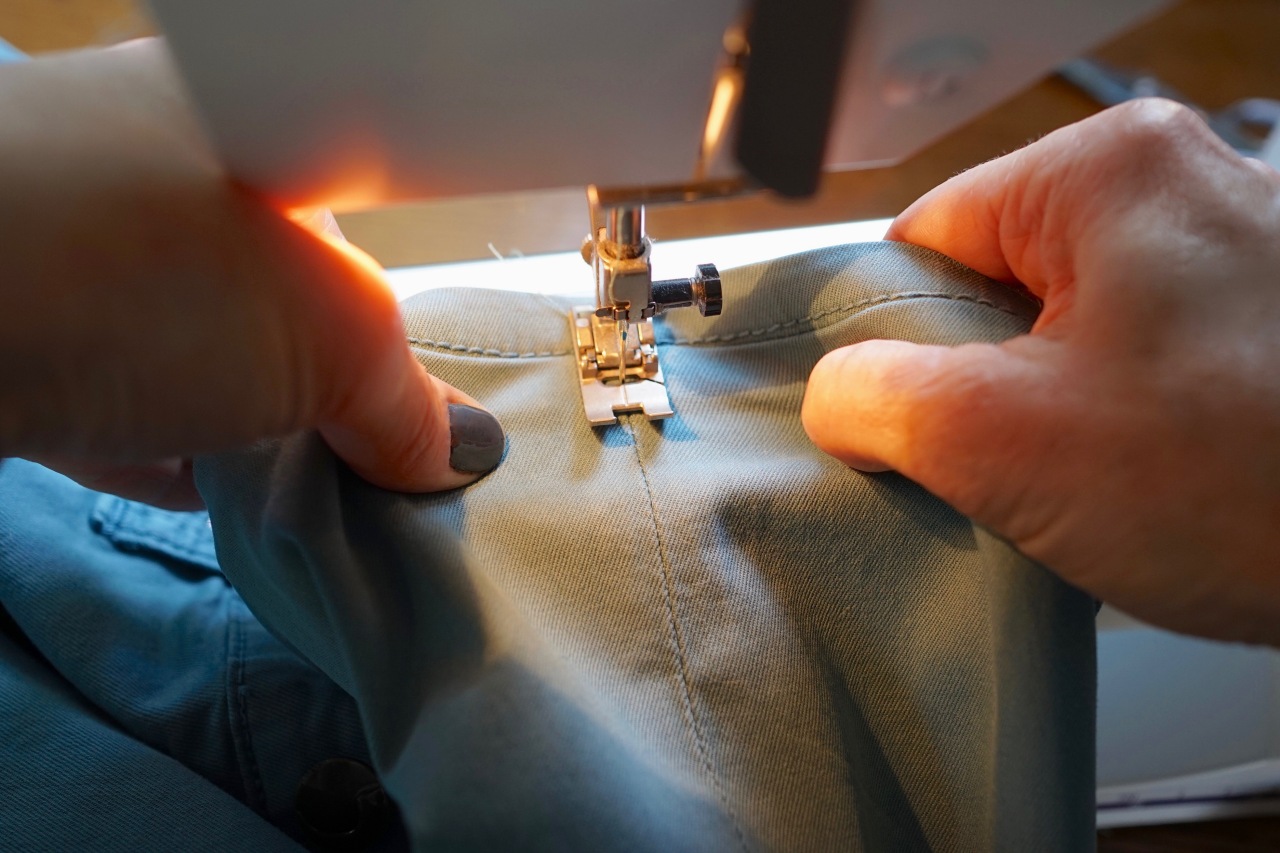
Do the same thing on the side seam that has topstitching. I stitched as close to the folded edge, next to the topstitching, as I could; so my topstitching is barely detectable.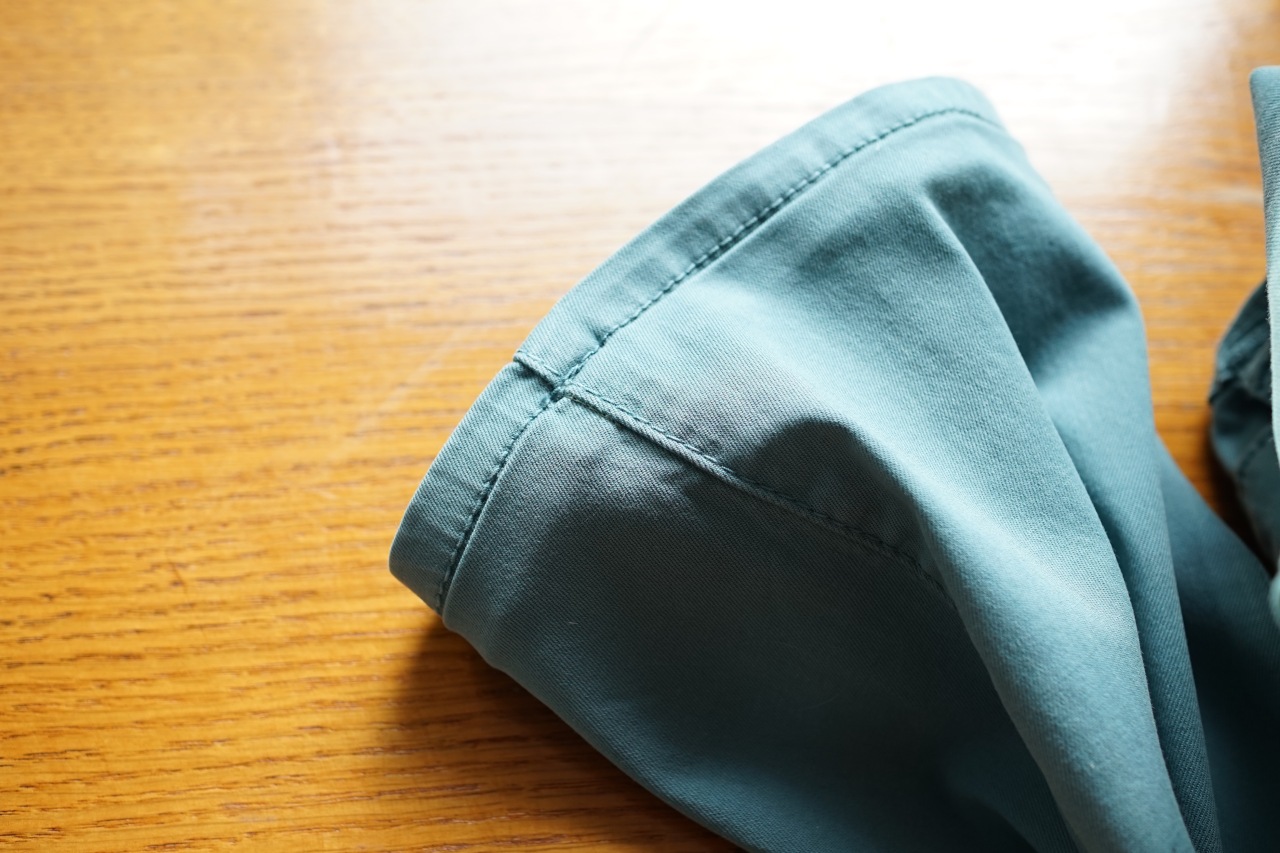
Sew a topstitch or two in the middle of the front and in the middle of the back of each hem to keep the zigzagged edges from turning upside down in the wash. This tiny amount of stitching is the reason matching thread matters.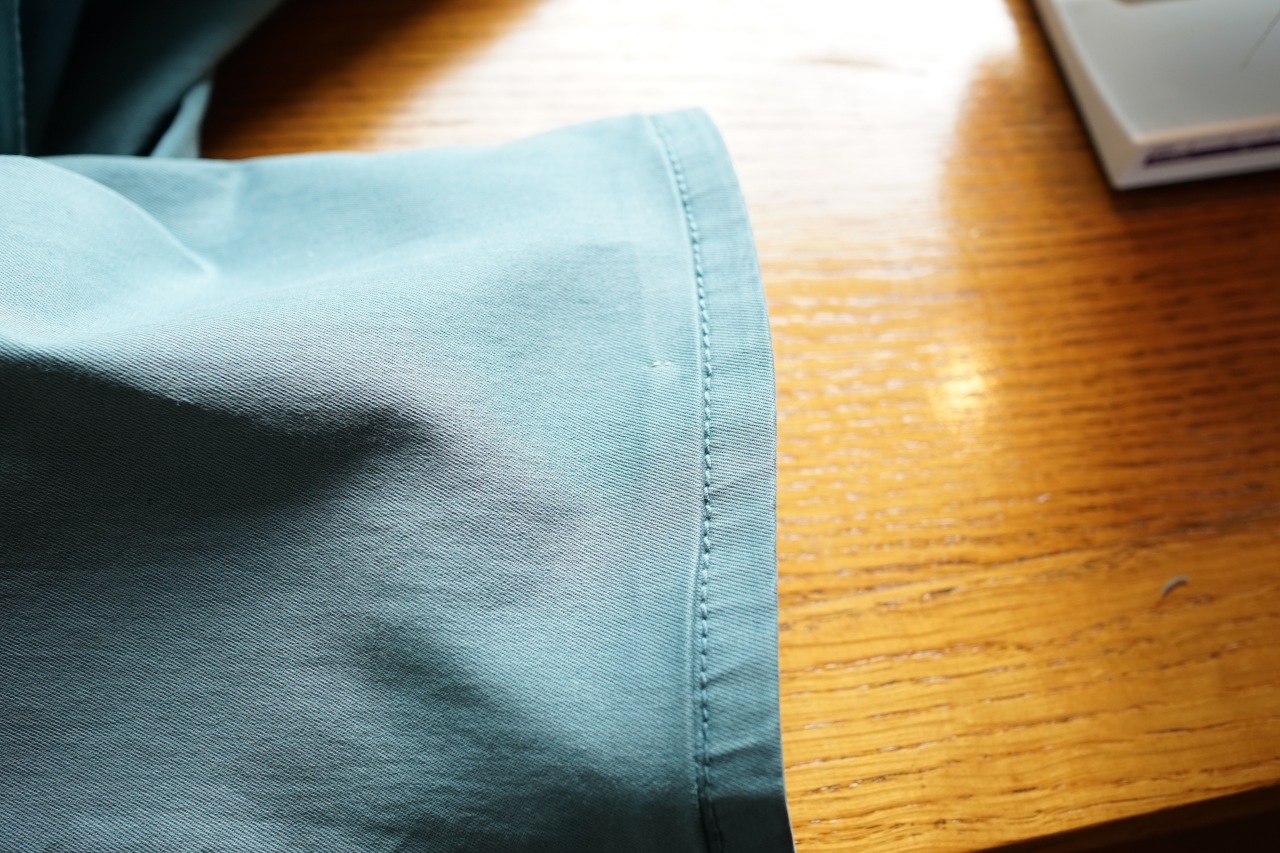
There you have it! An original hem.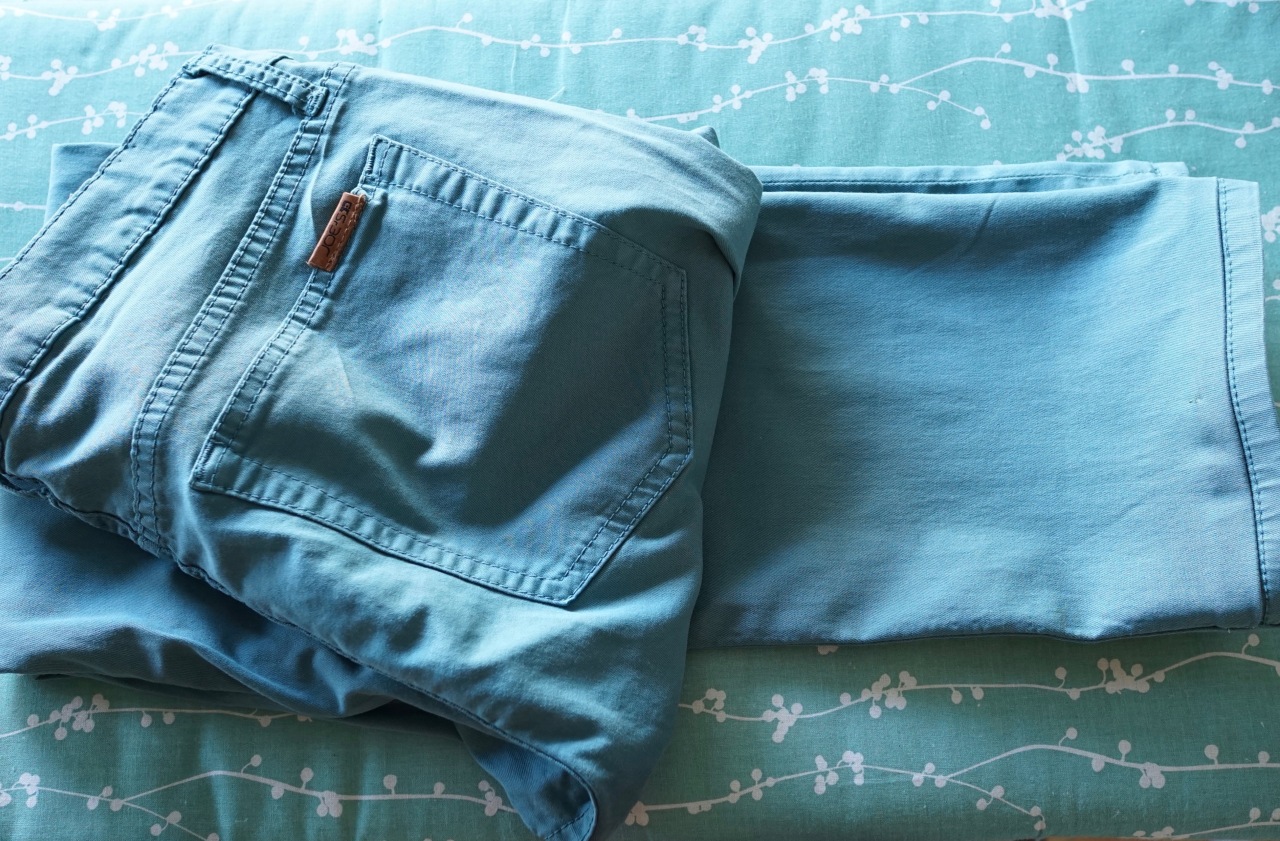
*This technique is best suited for straight legged jeans.


I’ve always wondered how that was done. Thanks for a great tutorial, Melissa! Easy-to-follow instructions. 🙂
xo, Janea
http://theSTYLetti.com
LikeLike
Janea, I’m glad I could answer that question for you! 🤗
LikeLike
Great information Mel! Now I won’t be uncool 😉
LikeLike
Val, You are always COOL!😉
LikeLike
Or, you could just ask your sister to do it for you! 😉
LikeLike
True.
LikeLike
Hi there. I just cut the hem of a pair of stretchy material jeans, and I like how the fringes are looking. I don’t think I’ll do a traditional hem. But, will these tiny flakes of thread or fringes keep crawling up the rest of the pants, hence ruining my jeans? Thx.
LikeLike
Hi Ana! If you leave your hem raw, depending on the fabric, it will fray after each of a few washings and some strings may look long and untidy, but you can trim those, so that the hem line stays even. Eventually, the strings get tangled and prevent further fraying. If you choose a raw hemline on a loosely woven fabric, it’s a good idea to sew a straight stitch somewhat close (1/4″-ish) to the hemline, in a matching thread, so that the unraveling won’t go above that line.
LikeLike
Thank you. I don’t know anything about your world, but what you explained makes sense. Thank you.
LikeLike
😉 I bet the raw hemline looks great on your jeans and I doubt the frays will travel very far up from the leg. If they start to fray too much, you can buy a product called Fray Check or Fray Block that might help.
LikeLike